If your floor jack isn’t lifting like before, feels soft, or drops when it should hold, air likely entered the hydraulic system. Bleeding your floor jack is essential maintenance for strong, safe lifting. Hydraulic jacks work with oil, not air. Even a small air bubble reduces lifting power and makes the jack act unpredictably—not what you want when lifting a car.
Garages across the US bleed floor jacks after shipping, storage, oil changes, or when performance drops. The good news? Bleeding a floor jack is simple if done safely and correctly. This guide shows the mechanic-approved way to restore your jack’s strength and reliability.
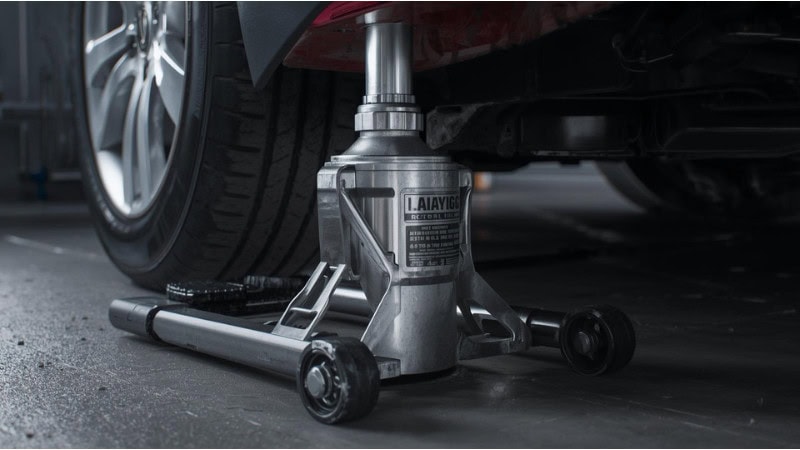
How a Hydraulic Floor Jack Works
A hydraulic floor jack is simple at heart. Liquids don’t compress, but air does. Pumping the handle sends hydraulic oil through check valves into a cylinder. This pressure moves a piston up, lifting the saddle and the load. With enough oil and a sealed system, the jack lifts smoothly and holds firmly.
But problems start when air sneaks into the system. Air bubbles compress when you pump, so you lose pressure that should be lifting the car. That’s why a jack with trapped air may rise slowly, feel bouncy, or not reach its full height. Bleeding the jack gets rid of that air and brings back full lifting power and safety.
When Should You Bleed a Floor Jack?
Knowing when to bleed your jack is as important as knowing how. Jacks don’t usually fail overnight. They give warning signs. If your pump runs slowly, won’t go up, or drops when closed, air is likely inside. Bleed after adding or changing oil, too, since opening the system lets air in.
New floor jacks may need bleeding after unpacking due to shipping and storage. If your jack sat unused for months, air can also enter it. Bleed at these times for smooth, safe lifting.
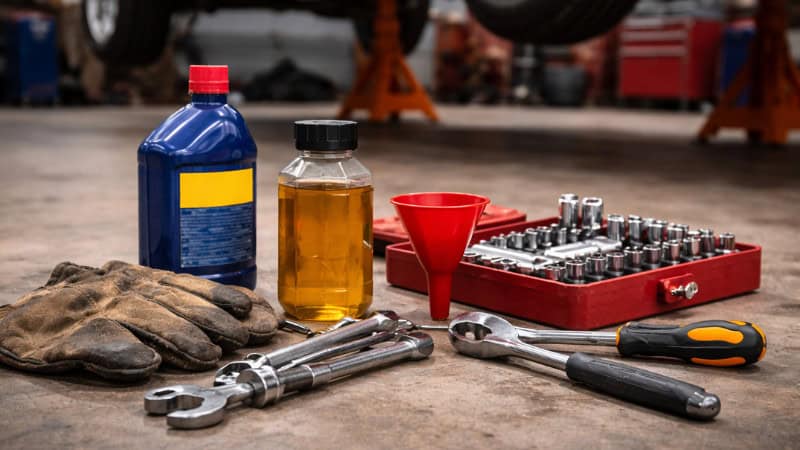
Tools and Supplies You’ll Need
Before starting, gather everything you need, so you don’t have to search mid-job. Most important: use the correct hydraulic jack oil. Most US jacks use ISO 32, but check your manual. Using the wrong fluid can damage seals and reduce performance.
You’ll also need a tool to remove the fill plug—usually a flathead screwdriver, Allen key, or small socket. Keep clean shop rags nearby to wipe spills and prevent dirt from getting inside. Wear gloves and safety glasses. Hydraulic oil in the eyes is no joke.
Safety First — Proper Setup Before Bleeding
Bleeding a floor jack is simple, but skipping safety steps can cause accidents. Before you begin, make sure the jack is rated to support no weight. Never bleed a jack holding a vehicle. Even a small load can shift if air escapes. Put the jack on a solid, flat surface for stability as you work.
Lower the jack fully by opening the release valve. Make sure the saddle is down before opening the fill port. If the jack is under a vehicle, use jack stands. In shops, this is mandatory. Proper setup ensures safe and smooth bleeding.
Step-by-Step — How to Bleed a Floor, Jack Correctly
Turn the release valve counterclockwise to lower the jack. Once the saddle is down, locate and remove the hydraulic oil fill plug. With the fill plug and release valve open, pump the handle slowly with full strokes. Take your time; pumping too fast can trap air rather than remove it.
Pump the handle about ten to fifteen times. This helps push air bubbles up and out through the open fill port. When done, check the oil level. It should sit just below the fill hole. Add more oil if needed. Replace the fill plug and close the release valve. Raise and lower the jack a few times to check the operation.
Step 1: Position the Floor Jack on Level Ground With No Load
Place the floor jack on a solid, level surface. Uneven ground can trap air during bleeding, giving false results. Ensure the jack is lifting nothing—no vehicle, no axle, no load. If the jack is under a car, remove it completely first. Bleeding under load is unsafe and can damage the seal. A stable, unloaded setup lets air move freely to the reservoir.
Step 2: Fully Lower the Jack to Retract the Hydraulic Piston
Turn the release valve counterclockwise to lower the jack. Watch the saddle and make sure it goes all the way down. Bleeding works only when the piston is fully retracted. If raised, the oil level is wrong, and air may stay trapped. Lowering the jack reduces internal pressure, so oil won’t spray or pull air back in when you open the fill port.
Step 3: Locate and Remove the Hydraulic Oil Fill Plug
Find the hydraulic oil fill plug on the jack body. For most US floor jacks, it’s on the side of the main cylinder and may be a rubber plug, slotted screw, or Allen plug. Before removing, wipe clean with a shop rag. Dirt entering the reservoir can damage seals. Once clean, remove the plug slowly and set it aside. This opening lets trapped air escape during bleeding.
Step 4: Open the Release Valve and Leave It Open
With the oil fill plug removed, make sure the release valve stays open. Turn it counterclockwise just enough so the jack won’t build up lifting pressure. Leaving the valve open is important because it allows hydraulic fluid and air to circulate freely. If the valve is closed, pumping the handle compresses the trapped air rather than removing it. This step creates the internal path for air bubbles to rise back and escape.
Step 5: Pump the Handle Slowly and Steadily
Pump the handle slowly with full strokes. Don’t rush. Fast pumping creates small bubbles that are harder to remove. Do ten to twenty controlled pumps. As you pump, air is forced back to the reservoir and out through the open fill port. The handle may feel soft or springy at first. That’s normal and should improve as air leaves the system.
Step 6: Check and Correct the Hydraulic Oil Level
After pumping, stop and check the oil level inside the fill port. The oil should sit just below the bottom edge of the fill hole. If it’s low, add the correct hydraulic jack oil slowly. Do not overfill. Too much oil causes pressure issues, leaks, or poor lowering. Avoid brake fluid or random substitutes—they can damage seals. The right oil level restores lifting power and keeps air from re-entering.
Step 7: Reinstall the Fill Plug Securely
Once the oil level is right, reinstall the fill plug. Make sure it’s snug, but not overtight. A loose plug lets air in and cancels your work. Wipe up extra oil so you can spot future leaks. A good seal is key to keeping pressure and safe operation.
Step 8: Close the Release Valve and Test the Jack
Turn the release valve clockwise to close it. Pump the jack to raise it to near full height. Lower it all the way down, then repeat the cycle 2 or 3 times. The jack should lift smoothly, feel firm, and hold height without drifting. If the jack feels weak or uneven, repeat bleeding. Ongoing problems after bleeding usually mean worn seals or internal damage rather than trapped air.
Common Floor Jack Bleeding Mistakes Mechanics Avoid
A lot of floor jack problems don’t come from bad jacks—they come from bad bleeding habits. One of the biggest mistakes is pumping the handle too fast. Fast strokes churn the oil and break air into tiny bubbles that are harder to remove. Another common issue is overfilling the reservoir. Too much oil leaves no room for expansion and can cause leaks or weak lowering action. Using the wrong fluid is another shop-floor sin. Brake fluid and power steering fluid will swell seals and shorten the jack’s life. Mechanics also avoid bleeding a jack while it’s under load. That’s unsafe and prevents air from returning to the reservoir. Cleanliness matters too—dirt in the fill port leads to internal damage over time.
you may like: 3 Common Types of Jacks for Automotive Use
Why Your Floor Jack Still Won’t Lift After Bleeding
If a floor jack still won’t lift after bleeding, the issue may be mechanical rather than air-related. One cause is low-quality or wrong hydraulic oil. It can bypass seals rather than build pressure. Worn internal seals are another common problem, especially on older jacks. When seals wear out, oil leaks inside, and the jack can’t hold pressure even with no air present. A bent piston rod can also cause binding. That makes the jack feel weak or uneven. Sometimes the release valve may not fully close due to dirt or wear. When bleeding doesn’t fix it, rebuilding or replacing the jack is often the safest option.
How Often Should You Bleed a Floor Jack?
Most floor jacks don’t need frequent bleeding if used and stored correctly. In a typical home garage, bleeding once a year, or after any drop in performance, is usually enough. You should also bleed the jack after adding or changing hydraulic oil. Opening the system lets air in. In busy shops, bleeding may be needed every few months as routine maintenance. Long storage is another trigger. If a jack sits unused for months, air can get in. Regular bleeding keeps the jack smooth, prevents sudden drops, and extends its life.
FAQ
FAQ 1: Can You Bleed a Floor, Jack, Without Adding Oil?
Yes, you can bleed a floor jack without adding oil if the oil level is already correct. Bleeding removes trapped air, not oil. However, many jacks that need bleeding are also low on fluid, especially after long storage or leaks. If the oil level is below the fill port, bleeding alone won’t fix weak lifting. Always check the oil level during bleeding. If it’s low, top it off with proper hydraulic jack oil to restore full pressure and performance.
FAQ 2: How Long Does It Take to Bleed a Floor Jack?
Bleeding a floor jack usually takes 10 to 20 minutes from start to finish. The actual pumping process only takes a few minutes, but setup, oil checking, and testing add time. If the jack has a lot of trapped air or hasn’t been serviced in years, you may need to repeat the process once more. Compared to replacing a jack, bleeding is quick, inexpensive, and well worth the time for restoring safe lifting performance.
FAQ 3: Do New Floor Jacks Need to Be Bled?
Yes, many new floor jacks need bleeding right out of the box. During shipping and warehouse storage, jacks are often laid on their sides or stored upright, allowing air to enter the hydraulic system. That’s why a brand-new jack may feel weak or won’t lift fully on first use. Bleeding a new jack before using it under a vehicle is a smart move and recommended by most manufacturers to ensure proper operation and safety.
FAQ 4: Can Air in a Floor Jack Cause It to Drop Suddenly?
Air alone usually causes weak or spongy lifting, but it can contribute to sudden drops when combined with other issues. Air compresses, which makes the jack less predictable under load. If seals are worn or the release valve isn’t sealing properly, trapped air can worsen the problem. That’s why bleeding is important for safety, not just performance. A properly bled jack reacts smoothly and predictably when lifting and lowering a vehicle.
FAQ 5: What Type of Oil Should Be Used After Bleeding?
Most floor jacks in the US are designed for ISO 32 hydraulic jack oil, but always check the manufacturer’s instructions. Using the wrong fluid can damage internal seals and reduce lifting capacity. Brake fluid is never acceptable, and ATF should only be used if the manufacturer explicitly allows it. Proper hydraulic oil maintains correct viscosity, seal compatibility, and pressure performance. Using the right oil after bleeding helps keep air out and ensures long-term reliability.
FAQ 6: Why Does My Floor Jack Feel Spongy After Bleeding?
If a floor jack still feels spongy after bleeding, there may still be air trapped in the system. This can happen if the handle was pumped too fast or the release valve wasn’t fully open during bleeding. Repeat the process using slower, controlled strokes. If the problem continues, worn seals or internal leakage may be the real issue. At that point, bleeding won’t fix it, and a rebuild or replacement should be considered.
FAQ 7: Can I Bleed a Floor Jack While It’s Under a Vehicle?
No, bleeding a floor jack while it’s supporting a vehicle is unsafe and not recommended. Releasing air can cause sudden pressure changes, which may unexpectedly lower the jack. Always remove the load before bleeding and support any vehicle with jack stands if needed. Professional mechanics never bleed a jack under load because it risks injury, vehicle damage, and improper bleeding results. Safety and control always come first.
FAQ 8: How Do I Know If My Floor Jack Is Beyond Bleeding?
If bleeding doesn’t restore lifting power after multiple attempts, the jack likely has internal problems. Common signs include oil leaking past seals, the jack sinking under no load, or visible fluid leaks. At that point, air is no longer the issue. Older or low-cost jacks may not be worth rebuilding, while higher-end models can often be serviced with seal kits. Knowing when to stop bleeding saves time and prevents unsafe use of equipment.
Conclusion
Bleeding a floor jack the correct way isn’t complicated, but it’s critical. Air in a hydraulic system robs the system of lifting power and causes unpredictable behavior, which is the last thing you want when working under a vehicle. Taking the time to bleed your floor jack properly restores smooth operation, solid lifting, and reliable holding power. Whether the jack is brand new, has been sitting for months, or is just starting to act weak, bleeding should be the first step before assuming it’s worn out. Just as important, always follow basic safety rules—no loading during bleeding, use correct hydraulic oil, and conduct controlled testing afterward. A properly bled floor jack isn’t just easier to use; it’s safer, more dependable, and built to last longer in any garage.
